트러블슈팅
- 개인위키 트러블슈팅
- 📁 프로젝트 구조 & 자주 쓰는 명령어
- #1. 도커 컨테이너 기반 프로젝트에서 자동 SSL 발급 받는 법
- #2. www 도메인 503 리디렉션 문제
- #3. DB 초기화 & 데이터 보존 트러블슈팅
- #4. 인증서 발급 후에도 보안경고 뜨는 문제
- #5. Git에 READ.md 파일만 있을때 로컬에서 처음 push 하는 경우
- #6. The current branch master has no upstream branch. 문제
- The value of the local variable n is not used 해결법
개인위키 트러블슈팅
📁 프로젝트 구조 & 자주 쓰는 명령어
전체 프로젝트 구조
- Docker 기반 BookStack + MariaDB
📁 DainWiki/
├── 📁 bookstack/         # BookStack 컨테이너 설정 및 데이터
│   └── ...                # 도커 이미지에서 마운트됨
├── 📁 bookstack_db/      # MariaDB 데이터
│   └── ...                  # (.frm, .ibd 등 DB 파일들)
├── 📁 certs/             # 인증서 저장소 (자동 생성됨)
├── 📁 html/              # nginx 기본 페이지 저장소
├── 📁 vhost.d/           # 가상 호스트 설정 (자동 생성됨)
├── 📄 docker-compose.yml   # 전체 도커 설정
bookstack container
📁 /app/www/
├── 📄 .env                  # Laravel 환경 변수
├── 📄 artisan               # Laravel CLI 진입 파일
├── 📁 config/               # 앱 및 DB 설정
│   ├── app.php
│   └── database.php 등
├── 📁 routes/               # 웹 라우트 설정
│   └── web.php 등
├── 📁 resources/            # 뷰 템플릿, 언어 리소스
│   ├── views/
│   └── lang/
├── 📁 storage/              # 캐시, 업로드, 로그 저장소
│   ├── logs/
│   ├── app/
│   └── framework/
└── 📁 public/               # 웹 루트 디렉토리
    └── 📁 uploads/          # 이미지 업로드 저장소
bookstack_db container
📁 /
├── 📁 var/
│   └── 📁 lib/
│       └── 📁 mysql/              # ⬅️ 이곳이 핵심: 실제 DB 파일 저장소
│           ├── 📁 bookstack/     # BookStack에서 사용하는 DB 테이블들
│           │   ├── users.ibd
│           │   ├── pages.ibd
│           │   └── ...
│           ├── mysql/           # 시스템 DB (사용자, 권한 관리)
│           ├── performance_schema/
│           └── ibdata1, ib_logfile0 등
├── 📁 etc/
│   └── my.cnf                    # MariaDB 설정 파일
└── 기타 Linux 기반 도커 파일들
1. SSH로 우분투 서버 접속
Linux, macOS, WSL, 리눅스 서버, VSCode 터미널
ssh -i ~/키이름.pem ubuntu@your-lightsail-ip윈도우 (Windows PowerShell / CMD)
ssh -i "C:\Users\aweso\pem\키이름.pem" ubuntu@your-lightsail-ip2. home 접속
- `.yml` 파일 위치
- docker 명령어들 실행하는 공간 (docker ps, docker-compose up -d. docker-compose down 등)
cd DainWiki3. 도커 컨테이너 안으로 들어가기
docker exec -it bookstack bash4. Laravel 앱 경로로 이동
- `.env` 파일 위치
docker exec -it bookstack bash
cd /app/www
ls -al .env
5. Laravel 설정 캐시 정리 및 마이그레이션 강제 실행
- DB 캐시 삭제
- DB 초기화(강제) 등
php artisan config:clear
php artisan cache:clear
php artisan view:clear
php artisan migrate --force
6. maria db 명령어 쓰는 곳
docker exec -it bookstack_db bash 여기서 실행
mysql -u root -p
비번 rootpassword

접속성공시
Welcome to the MariaDB monitor...
MariaDB [(none)]>
7. 남은 저장소 용량 확인
df -h#1. 도커 컨테이너 기반 프로젝트에서 자동 SSL 발급 받는 법
문제
- Docker 기반으로 AWS Lightsail에서 운영 중인 프로젝트에서
- HTTPS 접속 시 **브라우저에 '보안 경고'**가 표시되는 문제
원인
- 서버에 유효한 SSL 인증서가 설정되어 있지 않기 때문이다.
- HTTPS를 사용할 경우, 신뢰된 인증 기관(CA)에서 발급한 인증서가 필요하며
- 없을 경우 브라우저는 연결을 '안전하지 않음'으로 간주한다.
해결 방법
- Docker 환경에서 자동으로 SSL 인증서를 발급 및 갱신하도록 설정하기 위해
- 아래 두 개의 Docker 이미지를 기존
docker-compose.yml에 추가해서 해결했다.
사용 이미지
- Nginx Reverse Proxy
→jwilder/nginx-proxy:
여러 컨테이너에 대한 요청을 자동으로 프록시해주는 리버스 프록시 서버 - Let's Encrypt Companion
→jrcs/letsencrypt-nginx-proxy-companion:
위의 nginx-proxy와 연동되어, Let's Encrypt를 통해 SSL 인증서를 자동 발급 및 갱신
기존 구성
📁 DainWiki/
├── 📁 bookstack/
├── 📁 bookstack_db/
├── docker-compose.yml
yml 파일 수정 후
📁 DainWiki/
├── 📁 bookstack/         # BookStack 컨테이너 설정 및 데이터
├── 📁 bookstack_db/      # MariaDB 데이터
├── 📁 certs/             # 인증서 저장소 (자동 생성됨)
├── 📁 html/              # nginx 기본 페이지 저장소
├── 📁 vhost.d/           # 가상 호스트 설정 (자동 생성됨)
├── docker-compose.yml   # 전체 도커 설정
📌 ① Let's Encrypt 인증서 발급용 설정
service:
- VIRTUAL_HOST=dainwiki.com
- LETSENCRYPT_HOST=dainwiki.com
- LETSENCRYPT_EMAIL=your@email.com
📌 ② APP_URL 값 http → https로 변경함
-      - APP_URL=http://dainwiki.com
+      - APP_URL=https://dainwiki.com
→ 프로젝트가 내부적으로 https 주소를 인식하게 해준다.
📌 ③ nginx-proxy 및 letsencrypt 컨테이너 추가
nginx-proxy:
    image: jwilder/nginx-proxy
    container_name: nginx-proxy
    restart: always
    ports:
      - "80:80"
      - "443:443"
    volumes:
      - /var/run/docker.sock:/tmp/docker.sock:ro
      - ./certs:/etc/nginx/certs
      - ./vhost.d:/etc/nginx/vhost.d
      - ./html:/usr/share/nginx/html
    networks:
      - bookstack_net

  letsencrypt:
    image: jrcs/letsencrypt-nginx-proxy-companion
    container_name: letsencrypt
    restart: always
    environment:
      - NGINX_PROXY_CONTAINER=nginx-proxy
      - DEFAULT_EMAIL=your@email.com
    volumes:
      - /var/run/docker.sock:/var/run/docker.sock:ro
      - ./certs:/etc/nginx/certs
      - ./vhost.d:/etc/nginx/vhost.d
      - ./html:/usr/share/nginx/html
    depends_on:
      - nginx-proxy
    networks:
      - bookstack_net
→ 자동 프록시 + SSL 발급기 역할
#2. www 도메인 503 리디렉션 문제
문제
- 도메인: https://dainwiki.com, http://dainwiki.com은 정상 접속됨
- http://www.dainwiki.com, https://www.dainwiki.com 모두 접속 불가
- DNS 설정은 정상(A레코드 호스트에 @와 www(서브) 모두 정상 등록되어 있음)


원인 분석
- Docker 환경에서 nginx-proxy + letsencrypt-nginx-proxy-companion 조합을 사용 중
- .env 또는 docker-compose.yml 설정에 www.dainwiki.com이 포함되어 있지 않았음
- 인증서에 www.dainwiki.com이 누락되어 www 요청에 대한 자동 리디렉션이 설정되지 않음
해결방법
- Docker 환경에서 nginx-proxy + letsencrypt-nginx-proxy-companion 조합을 사용 중
- .env 또는 docker-compose.yml 파일 내 환경변수 아래와 같이 변경
VIRTUAL_HOST=dainwiki.com,www.dainwiki.com
LETSENCRYPT_HOST=dainwiki.com,www.dainwiki.com
LETSENCRYPT_EMAIL=you@example.com
변경 후에는 도커 컨테이너 재시작
docker-compose down
docker-compose up -d
이 설정을 통해
- www.dainwiki.com도 포함된 SSL 인증서가 자동 발급됨
- www 접속 시 https:// 로 자동 리디렉션됨
#3. DB 초기화 & 데이터 보존 트러블슈팅
문제
- 로컬에서 BookStack API 기반 개인 위키 프로젝트((Apache + PHP + MySQL) 진행 중 DB 초기화 발생
- 503 오류 발생으로 프로젝트 수정하던 중 기존에 업로드한 위키 문서 데이터 전부 초기화됨
원인 추정
- MySQL 데이터 저장 경로가 htdocs 외부에 없어 백업이 어려움
- 서버 재시작 혹은 캐시 삭제 과정에서 데이터 손실
- 영구 저장소 설정(volume, data 디렉토리) 미비
해결 방법
- 해결: AWS Lightsail로 이전, Docker + Volume 구성으로 데이터 보존 확보
- 현재: docker-compose up -d로 설정 수정 가능, 데이터는 안전하게 volume: 에 보관됨
- 추가 계획:
저장 공간 60GB 초과시 블럭 스토리지 추가하거나 백업 시스템 구축 예정
향후mysqldump또는 자동 백업 스크립트 도입 고려 - 플랫폼: AWS Lightsail $10 플랜 (2GB RAM, vCPU 1, SSD 60GB)
📂 구조
📁 DainWiki/
├── 📁 bookstack/        # BookStack 앱 설정, 이미지
├── 📁 bookstack_db/     # MariaDB 데이터 (위키 포스트, 계정 등)
├── 📄 docker-compose.yml
└── 📄 .env
✅ yml. 파일 데이터 저장 위치
bookstack:
  volumes:
    - ./bookstack_data:/config

bookstack_db:
  volumes:
    - ./db_data:/var/lib/mysql
데이터는 바인드 마운트(bind mount)방식으로 저장된다.
- 로컬 경로 (./bookstack_data)를 컨테이너 안 디렉토리(/config)에 연결
- 실제 데이터는 호스트(=Lightsail 인스턴스) 디스크에 저장하는 방식이다.
- 즉, 루트 디스크(/) 안에 ~/DainWiki/bookstack_data, db_data 등(예: /home/ubuntu/DainWiki/bookstack_data)
✅ 실제 호스트 저장 경로
docker inspect bookstack- 여기서 Mounts 항목 참고
✅ 남은 공간 확인
df -h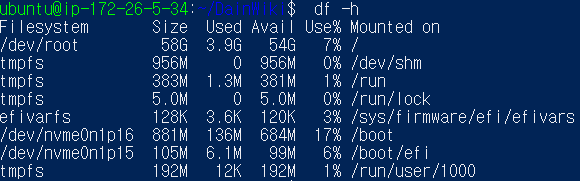
#4. 인증서 발급 후에도 보안경고 뜨는 문제
문제
- https://www.dainwiki.com 접속 시 보안 경고 발생
- www 서브도메인 등록 후 yml 파일 재설정 완료 → www로 접속하면 계속해서 보안 경고 뜸
- docker logs letsencrypt에서는 인증서 발급 관련 메시지가 있었지만, 실제 반영되지 않음
원인 분석
- .env에서 LETSENCRYPT_HOST 및 VIRTUAL_HOST는 정상적으로 설정되어 있었음 (www.dainwiki.com 포함)
- 인증서 발급도 로그상 성공했으나,
- Let's Encrypt Companion 컨테이너의 인증서 적용/리로드가 약간 지연됨
- 특별한 추가 작업 없이 잠시 기다리자 자동으로 인증서가 적용됨
- 즉시 반영되지 않고 약 5분 후에 자동 반영
해결 방법
SSL 인증서 발급 로그 확인
docker logs letsencrypt
도커 컨테이너 접속
docker exer -it nginx-proxy shdocker exer -it nginx-proxy bash인증서 디렉터리에 파일 있는지 확인하기
ls /etc/nginx/certs/- dainwiki.com/, www.dainwiki.com/ 폴더가 모두 있는지
- 그 안에 fullchain.pem, cert.pem, key.pem 등이 존재하는지 확인

- 특별한 추가 작업 없이 잠시 기다리자 자동으로 인증서가 적용됨
#5. Git에 READ.md 파일만 있을때 로컬에서 처음 push 하는 경우
문제
- GitHub에 이미 README.md가 있고, 로컬은 Git 초기화만 되어 있는 상태 처음 git push 하려고 한다.
- GitHub에서 먼저 pull 받아온 뒤 그다음 병합 또는 덮어쓰기 → push해야 한다.
- 이 때 git pull --rebase 가 안먹히는 문제
원인
명령어 | 사용 시점 | 의미 및 작동 방식 |
|---|---|---|
| ✅ 최초 1회만 | 서로 관련 없는 두 Git 히스토리를 강제로 병합 |
| ❌ 사용 불가 (초기에는) | 공통 조상이 있어야 rebase 가능함 → 이 상황에선 에러남 |
처음 1회만 pull 할 때 --allow-unrelated-histories를 써야 한다.
두 저장소가 '공통 커밋'이 없기 때문에 Git은 서로 관련이 없다고 판단하기 때문에 --rebase는 안 된다.
로컬과 원격이 X → A → B → C 처럼 같은 이력을 공유하게 되어 그 이후부터는 필요가 없다.
해결 방법
# 1. 원격 저장소 추가
git remote add origin https://github.com/내아이디/레포이름.git

# 2. 원격 저장소의 변경사항 먼저 가져오기
git pull origin main --allow-unrelated-histories

# 3. 충돌 났다면 해결 후 커밋

# 4. 이제 정상적으로 푸시 가능
git push origin main
이후부터는 git pull 또는 git pull --rebase 한다.
- git pull --rebase origin main → 깔끔한 히스토리 원할 때
- git pull origin main → 단순히 병합만 원할 때
#6. The current branch master has no upstream branch. 문제
문제
- Git Bash 에서 커밋 하던 중 아래와 같은 오류 메세지
The current branch master has no upstream branch.
$ git push fatal: The current branch master has no upstream branch. To push the current branch and set the remote as upstream, use git push --set-upstream origin master To have this happen automatically for branches without a tracking upstream, see 'push.autoSetupRemote' in 'git help config'.
원인
- 현재 로컬 브랜치(master)가 원격 브랜치와 연결되지 않음
- master로 계속 작업하고 싶으면 --set-upstream으로 연결하면 되지만
- main으로 올리고 싶어서 브랜치를 변경했다.
해결 방법
- master 브랜치를 main 브랜치로 바꿔서 해결했다.
- 이 작업은 로컬 + GitHub(또는 origin) 모두에서 브랜치 이름을 변경하는 작업이다.
git branch -m master main
git push -u origin main
# (GitHub에서 default branch 설정 변경)
git push origin --delete master   # (선택)
1. 로컬 브랜치 이름 변경하는 법
git branch -m master main- -m = move (rename)
2. 원격(origin)에 새 브랜치로 푸시
git push -u origin main- -u는 main 브랜치를 앞으로 기본 upstream으로 설정
3. GitHub에서 기본 브랜치를 main으로 바꾸기
- GitHub 웹사이트 → 해당 저장소로 이동
- Settings → Branches 메뉴 클릭
- Default branch를 master → main으로 변경
4. 기존 master 브랜치 삭제
git push origin --delete master💡 참고
만약에 master로 계속 쓸거면 아래처럼 --set-upstream 명령어를 쓰면 된다.
git push --set-upstream origin master이렇게 하면 origin/master 브랜치를 만들고 연결해서 master 브랜치를 원격(origin)에 푸시한다.
나처럼 지금 master 브랜치에 있고, 아직 원격 저장소에 연결되지 않았을 때,
위 명령어를 실행하면 앞으로는 git push, git pull만 쳐도 origin/master와 연결된다.
The value of the local variable n is not used 해결법
- 백준 9663 N-Queen https://www.acmicpc.net/problem/9663
package backTracking;

import java.util.Scanner;

public class backjoonNQueen {
	// 이렇게 하는 이유는 메서드 세개 모두에서 사용가능하게 하려고
	static int n;
	static int[] arr; // arr[i] = i번째 행에서 퀸이 놓인 열 위치
	static int answer = 0; // 해답 개수

	public static void main(String[] args) {
		Scanner sc = new Scanner(System.in);
		int n = sc.nextInt(); // 체스판 크기, Queen의 개수


		// arr[i] = j는 i번째 행(row)의 퀸이 j번째 열(column)에	있다는 의미
		// arr 배열의 인덱스는 행, 값은 열
		int[] arr = new int[n];

		dfs(0); // 0번째 행부터 시작
	    sc.close();
		System.out.println(answer);
	}

	static void dfs(int row) {
		// n은 체스판 크기이자 퀸 개수
		// 즉, 0 ~ n-1행까지 퀸을 다 놓았을 때
		// row == n 이면 row == 4이까 0~3행에 퀸을 다 놓은 상태
		// 이 시점에서 더 이상 행을 내려가서 퀸을 놓을 필요가 없음
		// 따라서 return; 으로 현재 DFS 호출 종료 → 이전 행으로 돌아감
		if (row == n) { // row == n → 모든 행에 퀸을 놓았다 → 해답 1개 완성 ★
			answer++;
			return; // 이전 행으로 돌아감 ★
		}

		for (int col = 0; col < n; col++) {
			arr[row] = col; // row행 col열에 퀸 노힉
			if (isPossible(row)) { // 지금까지 놓은 퀸들이 서로 공격하지 않으면
				dfs(row + 1); // 다음 행으로 이동
			}
		}
	}

	private static boolean isPossible(int row) {
      for (int i = 0; i < row; i++) {
        // 같은 열에 이미 퀸이 있으면 실패
        // 여기서 arr[i]는 이미 놓은 퀸들의 열 위치(과거 기록)
        // arr[row]는 지금 새로 놓으려는 퀸의 열 위치(현재 진행)
        if (arr[i] == arr[row]) return false;
        // 대각선에 퀸이 있으면 실패
        if (Math.abs(row - i) == Math.abs(arr[row] - arr[i])) return false;
      }

      return true;
	}
}
The value of the local variable n is not used
The value of the local variable arr is not used
이미 전역 영역에 변수 선언을 했는데 main에서도 중복 선언해서 에러가 난 것이다.
public static void main(String[] args) {
    Scanner sc = new Scanner(System.in);
    int n = sc.nextInt(); // 체스판 크기, Queen의 개수


    // arr[i] = j는 i번째 행(row)의 퀸이 j번째 열(column)에	있다는 의미
    // arr 배열의 인덱스는 행, 값은 열
    int[] arr = new int[n];

    dfs(0); // 0번째 행부터 시작
    sc.close();
    System.out.println(answer);
}
자료형을 떼고 변수명만 쓰는 방법으로 수정했다.
n = sc.nextInt(); // 체스판 크기, Queen의 개수
arr = new int[n];
만약 전역 영역을 최소화 할거면 전역 변수 arr을 없애고, main의 arr을 dfs에 매개변수로 전달하는 방법도 있다고 한다.
static void dfs(int row, int[] arr) {
    if (row == n) {
        answer++;
        return;
    }
    for (int col = 0; col < n; col++) {
        arr[row] = col;
        if (isPossible(row, arr)) {
            dfs(row + 1, arr);
        }
    }
}

private static boolean isPossible(int row, int[] arr) {
    for (int i = 0; i < row; i++) {
        if (arr[i] == arr[row]) return false;
        if (Math.abs(row - i) == Math.abs(arr[row] - arr[i])) return false;
    }
    return true;
}